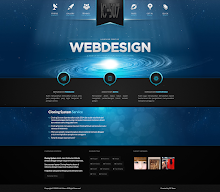
Please follow the instructions below carefully. I assume you already have a Blogger account. So let us begin.
2. Login to Blogger Dashboard and click the Template menu.
3. Click the Backup / Resore on the right top
4. Discover where the location Whitespot theme.xml
5. Then click Upload.
After the file uploaded, we will begin to adjust to your blog, starting from the settings menu.
To change the URLs on the menu, you need to log in to your Dashboard.
1. Click the Templates menu in your Dashboard
2. Click the Edit HTML
3. Then find the following code...
Still in the area of the Edit Html Template
1. Find the code below
1. Login to Dashboard
2. Click the Template
3. Click the Edit Html
4. Find the code below
1. Login to Dashboard
2. Click the Template
3. Click the Edit Html
4. Find the code below
1. Click on the Dashboard Templates
2. Edit Html
3. Find the code below
And thanks for buying Whitespot Responsive Blogger Template.
Get Started
Uploading/ Installation
1. Unzip WhiteSpot.zip.2. Login to Blogger Dashboard and click the Template menu.
3. Click the Backup / Resore on the right top
4. Discover where the location Whitespot theme.xml
5. Then click Upload.
After the file uploaded, we will begin to adjust to your blog, starting from the settings menu.
Menu
To change the URLs on the menu, you need to log in to your Dashboard.
1. Click the Templates menu in your Dashboard
2. Click the Edit HTML
3. Then find the following code...
<navi id='menul'>
<input type='checkbox'/>
<label>≡<span><a expr:href='data:blog.homepageUrl'><data:blog.title/></a> </span></label>
<ul>
<li><b><a expr:href='data:blog.homepageUrl'><data:blog.title/></a></b></li>
<li><a href='/p/about.html'>About</a></li>
<li><a href='#'>Drop Down</a>
<ul class='menus'>
<li><a href='#'>Photoshop</a></li>
<li><a href='#'>Illustrator</a></li>
<li><a href='#'>Web Design</a></li>
<li><a href='#'>HTML</a></li>
<li><a href='#'>CSS</a></li>
<li><a href='#'>Web Design</a></li>
<li><a href='#'>User Experience</a></li>
</ul>
</li>
<li><a href='#'>Contact</a></li>
<li><a href='#'>Advertise</a></li>
</ul>
</navi>Second Menu
Still in the area of the Edit Html Template
1. Find the code below
<li class='cnt'><a href='/search?max-results=6'>Posts</a><span class='count'/>
<script type='text/javascript'>
function postCount(json){
document.write("<span class='counts postx'>");
var count = json.feed.openSearch$totalResults.$t;
document.write("<span class='count'>" + count + "</span>");
document.write("</span>")
}
</script><script expr:src='data:blog.homepageUrl + "/feeds/posts/default?alt=json-in-script&max-results=0&callback=postCount"'/>
</li>
<li class='cnt'><a href='/p/friends.html'>Friends</a><span class='count'/>
<script type='text/javascript'>
function commentCount(json){
document.write("<span class='counts commx'> ");
var count = json.feed.openSearch$totalResults.$t;
document.write("<span class='count'>" + count + "</span>");
document.write("</span>")
}
</script><script expr:src='data:blog.homepageUrl + "/feeds/comments/default?alt=json-in-script&max-results=0&callback=commentCount"'/>
</li>
<li class='drop'><a href='#'>More</a>
<ul>
<li><a href='#'>Photoshop</a></li>
<li><a href='#'>Illustrator</a></li>
<li><a href='#'>Web Design</a></li>
<li><a href='#'>HTML</a></li>
<li><a href='#'>CSS</a></li>
<li><a href='#'>Web Design</a></li>
<li><a href='#'>User Experience</a></li>
<li><a href='#'>FreelanceSwitch</a></li>
<li><a href='#'>Creattica</a></li>
<li><a href='#'>WorkAwesome</a></li>
<li><a href='#'>Mac Apps</a></li>
<li><a href='#'>Web Apps</a></li>
<li><a href='#'>ThemeForest</a></li>
<li><a href='#'>GraphicRiver</a></li>
<li><a href='#'>ActiveDen</a></li>
<li><a href='#'>VideoHive</a></li>
<li><a href='#'>3DOcean</a></li>
</ul>
</li> Slider Photo
1. Login to Dashboard
2. Click the Template
3. Click the Edit Html
4. Find the code below
<ul>
<li><a href='#'>  <img alt='' class='slimg ' src='https://googledrive.com/host/0ByqhjC92aoIQT2pRU1ExYlNMblU/final1.jpg'/>
 </a>
</li>
<li>
 <a href='#'>  <img alt='' class='slimg' src='https://googledrive.com/host/0ByqhjC92aoIQT2pRU1ExYlNMblU/final.jpg'/>
 </a>
</li>
<li>
    <a href='#'>  <img alt='' class='slimg' src='https://googledrive.com/host/0ByqhjC92aoIQT2pRU1ExYlNMblU/final2.jpg'/>
 </a>
</li>
<li>
 <a href='#'>  <img alt='' class='slimg' src='https://googledrive.com/host/0ByqhjC92aoIQT2pRU1ExYlNMblU/final3.jpg'/>
 </a>
</li>
</ul>
<div class='clear'/> Slider Cover
1. Login to Dashboard
2. Click the Template
3. Click the Edit Html
4. Find the code below
<div class='mycover'>
<ul>
  <li><img src='https://googledrive.com/host/0ByqhjC92aoIQT2pRU1ExYlNMblU/w1.jpg' title='My Cover'/></li>
<li><img src='https://googledrive.com/host/0ByqhjC92aoIQT2pRU1ExYlNMblU/w2.jpg' title='My Cover'/></li>
<li><img src='https://googledrive.com/host/0ByqhjC92aoIQT2pRU1ExYlNMblU/w1.jpg' title='My Cover'/></li>
<li><img src='https://googledrive.com/host/0ByqhjC92aoIQT2pRU1ExYlNMblU/w3.jpg' title='My Cover'/></li>
</ul>
<div class='clear'/>
</div>Social Menu
1. Click on the Dashboard Templates
2. Edit Html
3. Find the code below
<ul>

        <li><a class='social-rss' href='#' target='_blank'>RSS</a></li>

        <li><a class='social-facebook' href='#' target='_blank'>Fb</a></li>

        <li><a class='social-twitter' href='#' target='_blank'>Twit</a></li>

        <li><a class='social-google' href='#' target='_blank'>G+</a></li>

</ul>Setting up The Custom Page
About Page
- Search Folders "Page" on the package Whitespot
- Open the "About.txt" file with Notepad.
- Copy all the code inside
- Then go to your Blogger Dashboard
- Click Page on the Dashboard
- Create a New Page
- Click the button Html
- Paste all of the code
- Publish
- Adjust sentence and fill in the appropriate page of your blog
Contact Page
- Search Folders "Page" on the package Whitespot
- Open the "Contact.txt" file with Notepad.
- Copy all the code inside
- Then go to your Blogger Dashboard
- Click Page on the Dashboard
- Create a New Page
- Click the button Html
- Paste all of the code
- Publish
- Adjust sentence and fill in the appropriate page of your blog
To activate the Contacts function is the form, follow the steps below
1. Go to Menu Layout on the Dashboard
2. Click on Add Gadget
3. More Gadgets
1. Go to Menu Layout on the Dashboard
2. Click on Add Gadget
3. More Gadgets
4. Save
Widget
- Search Folders "Widget" on the package WhiteSpot
- Open the "Widget.txt" file with Notepad.
- Copy all the code inside
- Then go to your Blogger Dashboard
- Click Layout on the Dashboard
- Add a Gadget
- Paste all of the code
- Save
And thanks for buying Whitespot Responsive Blogger Template.


